


If you click on the links in this post, we may earn money from the companies mentioned in this post, at no extra cost to you. You can read the full disclaimer here.
Need to build a website for the first time? Let’s go over how to make a website with Weebly – and, luckily, it’s not only easy, but fun!
Now, there are plenty of reasons to set up a new website: for a new online business idea, an existing brick-and-mortar business, an upcoming an event, or a personal blog, to name a few.
However, if you’ve never created a website before, the experience might seem a little overwhelming.
This is why I appreciate how Weebly works.
It just takes a few steps to get you up and running with your brand new website – and you don’t have to have any experience in coding or web design!
Recently, I had the experience of test driving Weebly, so to speak. This was the first time I had created a new website with Weebly in awhile, and I was seriously impressed with how well the process worked.
Setting Up Your Weebly Website
First, I set up a free account on Weebly, which was pretty quick and easy.
The next step was choosing if I wanted a website or a website with an online store – I chose just a website, since I didn’t need an online store for the site I had in mind.
Now it was time to pick a theme. The theme is just how your website will look – such as if there is a header at the top, where the menu is located on the page, etc. Luckily, you don’t have to create the whole thing from scratch! Weebly has some predesigned themes, so you can check them out and pick the one that will work best for your website. If you’re not sure about a theme, you can click on the theme which leads to a Theme Preview, which is helpful.
The different theme options are found under the following headings:
- Online Store
- Business
- Portfolio
- Personal
- Event
- Blog
- Other
After looking through the sections, I picked one from the Blog section.
Once that was decided, I clicked where it said Start Editing.
Editing Your Weebly Website
The first step in editing my new site was picking a domain name, which is basically the URL of the site. For example, the domain name of this site is websitetipsandtutorials.com.
For my new weebly site, I decided to stick with a domain name that had “weebly.com” at the end as it’s free, but I could have chosen one that came with a paid plan to get rid of the “weebly” in the domain name. Tip: If you’re planning on using your new site for business purposes, choosing a paid plan to get rid of the “weebly” is worth it, as it looks more professional.
From there, I started changing the theme to fit mine – changing the words in the header to the title of my website, changing the picture in the header to a picture that fit my website, etc. To change the words, I just hovered over the words, then clicked on them and started typing the new words I wanted to use. To change the picture in the background, I simply clicked on the picture that was already there. I then had an option to edit background, which I clicked on. This gave me an option to Replace or Edit, so I picked Replace.

For these things, it was fairly intuitive – I saw something I wanted to replace, so I clicked on it!
Now, I noticed that on the bottom of the screen, there were a couple of buttons in the bottom left hand corner – one for Comments and one for Blog Settings. Since I didn’t want to have to deal with moderating comments, I clicked on Blog Settings to see if I could disable comments. Sure enough, it brought me to a screen where I could change the settings for my blog, including how comments were handled. Next to Comment Default, I chose Closed from the drop down menu. You can then click on Save to update your preferences.

Keep in mind, there were a lot of other settings listed on that page that I could have changed. For example, I could show 20 posts per page instead of the default 10. If I had wanted comments, I could have listed an email address so that I could be notified of new comments. However, I really only wanted to close comments, so I just stuck to the change I wanted to make.
If you’re the kind of person who likes to fine tune every detail, then it’s great to have the option to change all these settings. However, if you’re new to making websites – or if you’re not new but feeling a little overwhelmed (which is totally normal, trust me!) – then I recommend just changing what you know you want to change or need to change at that time. Don’t allow yourself to get too caught up in the different options in the settings. You can always go back later if you realize you need to change something else, or even if you’re bored and just feel like exploring new options! But again, at this stage, I recommend focusing on what you need, then going back later and adding to your website or customizing it even more.
Adding or Editing Pages on Your Weebly Site
So I was almost ready to make my new Weebly website live, but there was one more thing I had to do first – edit the pages.
I had only been making changes on the homepage or main page of my website.
When you’re editing your website on Weebly, there is a menu at the top of the screen with different options. If you click on Pages, then on the left hand side you get a list of pages on your website.

Want to add a new page to your website? Click on the + sign to add a page. You can choose from these types of pages:
- Standard Page
- Blog Page
- Category Page
- Product Page
I decided to add a resource page to my website, to add some helpful links to other sites. I chose Standard Page as I felt that would fit my purposes the best.
On the left hand side, I named the page. Then, on the page itself, I edited it to add a name to the heading, a picture to the background of the heading, and a few links in the body (or main part) of the page.
How did I add the links? Well, in the body of the page it said “Drag Elements Here”. In the top menu, I clicked on “Build”. Now, I had a bunch of options on the left hand side of my screen of things I could add – things like an image, a slideshow, text, a button, a survey, social icons and more.

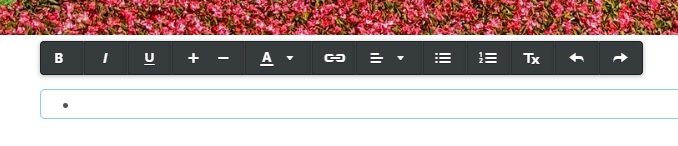
I clicked on the icon on the left that said Text, then dragged it and dropped it onto the main section of my new page.
Where it said Click here to edit, I clicked and edited! From the text toolbar that appeared, I chose the Bulleted List. I also used the link button to make the words into a link to another website.
 Now, on my list of pages, three pages automatically came with my website theme – Blog, a Who We Are page, and a Get In Touch page.
I clicked on the Who We Are page and edited it so that it actually talked about my website. I then decided that I didn’t really want the page to show up in the main menu at the top of the website. So, on the left hand side, under Page Name, I checked the box that said “Hide in Navigation”. That way, the page was no longer part of the menu,
For Get In Touch, I clicked on the page to edit it. Then, using the “Build” option in the top menu, I chose the Contact Form and dragged it onto the page.
From there, I was ready to publish my new site!
Final Thoughts
Now, this is definitely a bit of a bare bones site – it is a blog with no blog entries yet. But I have the site structure in place so that I can start adding blog entries. If I had wanted more of an informative or “static” site (meaning, I’m not constantly updating with new blog posts or information), I could have done it all when I was setting up the site.
I did this in a couple of different sittings, but I would say it took me between 20-30 minutes to set this up (not counting how long it took me to pick out the two photos I used!).
The whole thing was honestly the easiest experience I’ve had to date with a drag-and-drop type website. In the past, I’ve had some frustrations with getting elements to fit a certain way, but by using a theme I liked and just adding elements from the “Build” options, it was very easy!
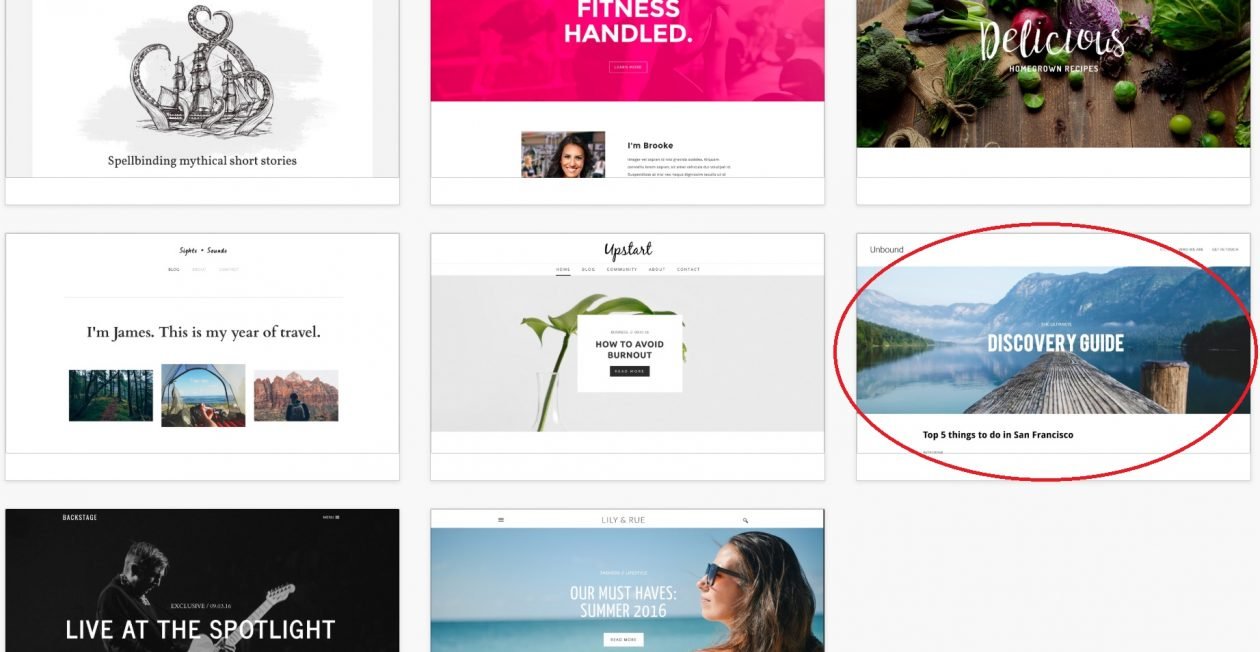
To see the final results, here is how my theme looked originally (it is the one circled):
Here is how the site looks now:
Daily Disney Fun, a Weebly website


