


If you click on the links in this post, we may earn money from the companies mentioned in this post, at no extra cost to you. You can read the full disclaimer here.
Here at Website Tips & Tutorials, we are big fans of Kinsta for hosting WordPress websites. And one of the Kinsta features we love is the ability to create a staging site for testing purposes. The staging site is basically a duplicate of your website.
Whether you’re troubleshooting an issue, updating plugins, or just trying out a new feature on your website, you can do it on a staging site while your “live” site continues to function as usual.
Today, we’re going to go over how to set up a staging site on Kinsta. Now, there are a couple of options available – a premium staging environment (for an additional cost) or a standard staging environment (included in the cost of hosting). We’re going to focus on the standard version.
How to Create a Staging Site on Kinsta
First, make sure you’ve selected the website you want to duplicate/clone from your Kinsta dashboard. (This is only an issue if you have multiple sites on your account.)
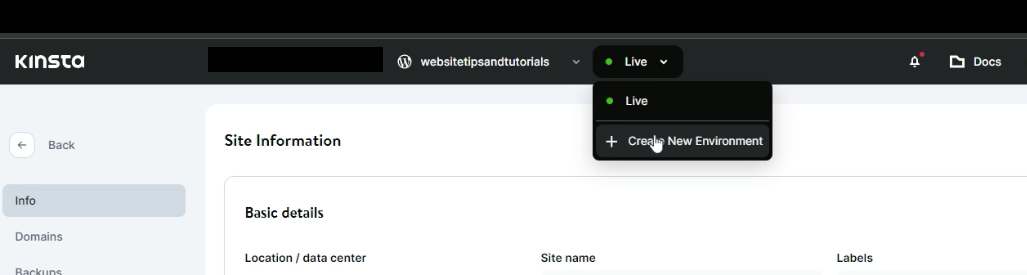
Next, click on where it says “Live” next to a green circle at the top of the screen. And then click where it says “Create New Environment.”
You’ll be able to choose between creating a premium environment and a standard (free) environment. Click on the Standard environment, and then click on the button that says “Continue.”

At this point, you’ll be able to select one of three options:
- Clone an existing environment
- Install new WordPress
- Empty environment without WordPress
In our case, we want our staging site to be just like our actual, or “live,” website. So we’ll pick “Clone an existing environment.”
Where it says “Environment name,” you can type any name you’d like. I recommend making “Staging” part of the name you create, just to make it very clear to yourself going forward that it’s a staging environment and not your live website. (In our example today, I’ll name the environment “WTT-Staging.”)
Under “Environment to clone,” it should already say Live, so let that stay the same and click on “Continue.”

It can take up to a few minutes for the staging site to be created. Remember when we clicked on where it says “Live” next to a green circle near the top of the screen? Now, when we click there, we’ll also have an option to choose our staging site.

If we click on the name we gave our staging site, there’s a good chance it won’t be ready quite yet. It can take a few minutes for the staging site to be created. So if you get this message, don’t worry! You’ll be able to use your staging site soon.

Once the staging site is ready, the message will be replaced with the same details you’d see for your live site, only it’s for your staging site now. Just take a look at the top of your screen to see if you’re in the live environment or staging environment (marked on the next screenshot with a red arrow).

And there you have it! You’ve now created a staging site.
Of course, you’ll want to be able to use this new staging site.
Accessing a Kinsta Staging Site
On the left side of the screen, click on where it says “Domains.” You’ll have the option of opening the staging site itself or opening the WordPress admin for the staging site. (You’ll use the exact same admin username and password to log in as you would for the live site.)

You may notice that the URL for the staging site includes the prefix “stg-” as well as the name of our site and the name we created for our staging site. If you click through, you’ll notice it will also say “kinsta.cloud” at the end of the name.
Kinsta Staging Push to Live
Let’s say that you’re done making changes to the staging site and you’re very happy with how it all worked out. So happy, in fact, that you’d like your live site to be exactly like your staging site.
Luckily, there is an easy way to do this. And that’s by pushing your staging site to live!
In the Kinsta dashboard, make sure you’re on the Site Information section for your staging site. (In the menu on the left, you’ll see the word “Info” highlighted.) Click on the blue button in the upper right hand corner that says “Push environment.” Then, click where it says “Push to Live.”

Next, you’ll have some checkbox options. You want to select both “Files” and “Database.” When you check those boxes, the “Run search & replace” will be automatically checked.

There’s also a box where you’ll need to enter your site name to confirm that this is where you want to push your staging site. Once you’ve typed in your site name, click on the “Push to Live” button.
Just like when you originally created your staging environment, it may take a few minutes for the process to be completed. And you’ll get a message informing you of this.
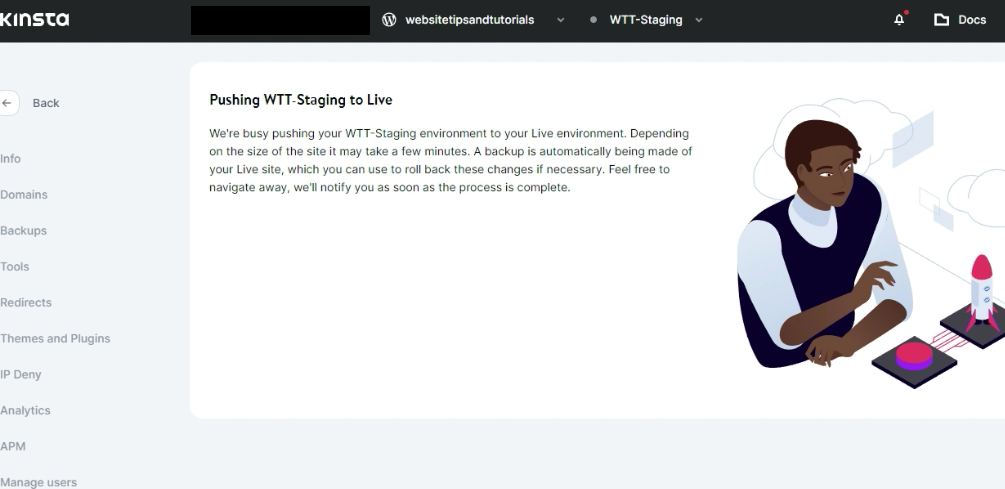
As the message also mentions, a backup is made of your live site, which is a really helpful feature. If you realize that you need to reverse the changes you made to the staging site after you’ve pushed it live, you can restore your live site to that backup.
Once the process is complete, this message goes away and the dashboard goes back to normal. At that point, if you visit your live site, you’ll notice that it now looks and works just like your staging site did!
Sign Up for Kinsta
Being able to easily create a staging site and then push it live is just one of the Kinsta features we love here at Website Tips & Tutorials.
We certainly recommend signing up for Kinsta web hosting.
We actually switched to Kinsta when we were having an issue with one of our websites while on a different hosting company. Moving to Kinsta solved the issue completely (which was a huge relief!). If you’re thinking about switching, you’ll be happy to know that they actually offer free migrations to Kinsta if you’re currently using one of these web hosts:
- SiteGround
- WP Engine
- HostGator
- Pantheon
- Flywheel
- GoDaddy
- tsoHost
- Savvii
- DreamHost
- WPX Hosting
- Cloudways
- A2 Hosting
- Pagely
- Bluehost


